

On long camping trips, it can be difficult to keep your fresh food cold and safe to eat. So, I’ve put together a handy guide on how to keep food cold for a whole week of camping. Camping is so much better when you bring fresh food and can cook delicious meals instead of relying on dry or instant food – there’s a limit to how much trail mix you can consume!
Before we begin, I’ll say that this guide is meant for those who are campsite camping with a cooler – as in, you don’t have an RV with a fridge and you aren’t backpacking anywhere.
How to keep food cold for a week camping:
Step 1: Start With The Right Cooler
While it can be tempting to save a few bucks by going with a cheap Styrofoam cooler, don’t do it. You’ll likely end up having to refill the ice every day or worse yet, your food might spoil and you’ll have to throw it all out. Higher end coolers are more expensive, but they have much more effective insulation, will keep your food cold for longer, and they’ll last many years.
In order to hold a week’s worth of food, you’ll need a pretty good sized cooler, especially if you’re camping with multiple people. Keep in mind that your food should only occupy about 60% of the space and you’ll need to fill the rest with ice in order to keep food cold long-term.
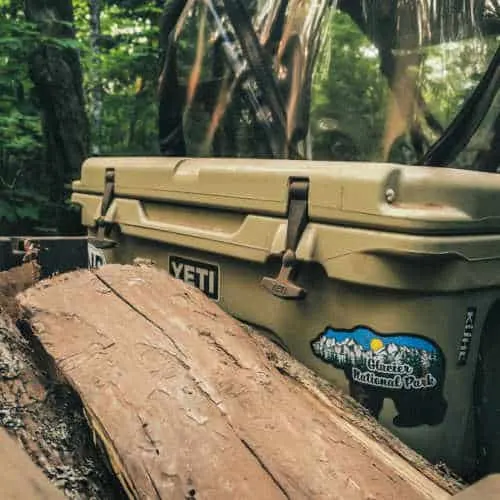
While they are expensive, Yeti coolers are the gold standard. They are durable, in some cases bear-proof, and they have excellent insulation. However, there are some cheaper options available as well that are still quite effective.
Step 2: Pre-Freeze Your Food and Water
Planning ahead is crucial to successfully keep your food cold for a full week. Specifically, freeze your food and most of your drinking water ahead of time. That way everything will stay cold longer and be fresher when it’s time to use it. If you are freezing raw meat or another ingredient that can potentially contaminate other food, be sure to double bag it and seal it carefully.
By freezing water bottles, you have DIY ice packs that will eventually be consumed, and you won’t be left with a lake of water in the cooler. Frozen water bottles also stay frozen longer than ice cubes, keeping your food cold for more days.
Step 3: Choose The Right Ice
Ice packs are superior to bagged ice for keeping things cold for a long time, and they won’t melt into a pool. However, once they do get warm, they become useless. Often the best ice selection is actually a combination of your frozen food/water bottles from Step 2, some ice packs, and some bagged ice as a resupply midweek if you have the option.
You can also make your own “ice packs” by freezing water in plastic baggies. Although they aren’t reusable and won’t stay cold quite as long as a real ice pack, DIY packs are a good option in a pinch.
Step 4: Pre-Cool The Cooler
This is something of a pro-level tip that will help you eke out every last second of coldness for your cooler contents – it’s not strictly necessary for casual travel but it does make a difference. A few hours before you plan to pack the cooler (or the night before for early morning departures), simply empty a bag of ice into the cooler, close the lid, and let it sit and cool off.
Then when you are ready to pack it, dump the ice and load up the pre-cooled cooler. That way your frozen food and ice doesn’t have to work extra hard bringing the interior temperature of the cooler down.
Step 5: Pack The Cooler Strategically
In short: pack it right, pack it tight. The more air is in the cooler, the faster the contents will warm up. So, it’s important to pack everything tightly together and fill in any gaps with ice.
Also, there is a strategy to packing a cooler – don’t just throw everything in willy nilly. Starting with your pre-cooled cooler, make a layer of ice or ice packs that covers the whole bottom. Then put in any meat you might have to prevent it from dripping errant juices onto your other food. Ideally, you will have pre-frozen the meat.
Next, if you have enough room, put down another layer of ice/ice packs/frozen water bottles. Then pack in your sealed items that won’t be ruined by water from melting ice – things like an unopened tub of potato salad or a sealed package of cheese. Top this with yet another layer of ice.
Finally, pack delicate items and produce on top. Fill any remaining space with ice.
Step 6: Keep The Cooler In The Shade
Obviously, your cooler and the contents within will stay colder if the cooler is kept out of direct sunlight, since the solar radiation can increase the temperature by a good 10-15 degrees. Stash the cooler under the picnic table, canopy, or a nearby tree. You may need to move the cooler around throughout the day as the shade moves.
Step 7: Monitor The Temperature Inside The Cooler
Especially if you have things like meat, eggs, and dairy in your cooler, monitor the internal temperature with a small thermometer. If the temperature remains below 40 degrees, the food is still safe to eat. Since coolers are not regulated like fridges are, it’s always a good idea to keep an eye on the actual temperature just in case. There’s nothing worse than getting a food-borne illness while on vacation.
If you notice the temperature creeping up towards 40, you can always supplement with fresh ice if there’s some available near where you’re camping.

Additional Tips To Help Keep Food Cold for 7 Days of Camping
Now that we’ve covered the basic strategy, let’s look at some alternative options and bonus tips for how to keep food cold for a week while camping.
Use an Electric Cooler or Small Fridge
There are also electric coolers available these days that can be powered by your car’s battery or plugged into a power source at your campsite. Or, you can be extra fancy and bring along a mini fridge. Both options can also be powered with a solar generator like a Jackery Explorer if you don’t want to risk killing your car batteries and/or there’s no power hookups where you’re camping.
Use Two Coolers
Using two coolers allows you to designate one for food and one for drinks. Drinks are often accessed more frequently than food, so having a separate cooler for beverages means that the food cooler can stay closed and cold. Since the drinks won’t spoil, you can use no-fuss bagged ice and not worry too much about the exact internal temperature.
Use Dry Ice
Dry ice can be a good way to keep food super cold, but it requires careful handling. Never touch dry ice with your bare hands, and be sure that it’s wrapped in newspaper or butcher paper before you put it in the cooler – it can damage the cooler if it comes into direct contact. Put the dry ice on top of your food for best results.
Dry ice produces carbon dioxide, which can be dangerous in an enclosed space. So, only use it if you can transport the cooler in a truck bed or trunk, away from the main car cabin. Additionally, don’t place a cooler containing dry ice next to your tent or near kids or pets.
Insulate the Cooler with Sand, Reflectix, or Blankets
If there’s no shade available, you can still take steps to prevent the sun from cooking your cooler. Sand is actually one of the best insulators, so you can keep your food cold for an extra long time by digging a hole and essentially recessing your cooler into the ground if you’re camping on or near sand. Cover the top with some reflectix or blankets to keep the sun off it.
If that sounds like too much work, you can skip the digging and just throw a couple of heavy blankets over the entire cooler for some added insulation, which will help keep your food cold for a whole week camping.
Don’t Open the Cooler Frequently
The more the cooler is opened, the faster the ice will melt and the interior will warm up. That’s why it’s a good idea to have a separate drinks cooler as I mentioned above. Avoid opening the food cooler except for when you are removing food to prepare it.
To avoid having to dig around for items that may or may not still be in the cooler, keep a paper list of the contents and cross things off as they are consumed. Pack things in an easy-to-remember way, such as with fruits on the left and veggies on the right or something similar so you don’t have to paw through the whole cooler for what you’re looking for.
Don’t Drain the Water
If you pack loose ice, it will inevitably eventually melt into water. Even if you use frozen water bottles or ice packs, there will be some condensation that will pool at the bottom of the cooler. Unless you need the space to add more food or ice, it’s actually best to leave the water in place. The cold water will still keep your food cold – even better than proximity to ice!
Cook and Freeze Food Ahead
I mentioned freezing your food ahead of time, but you can actually save time and space by cooking some of your food ahead of time and then freezing it, as opposed to freezing individual ingredients. Cooked food often stays good for longer, and you don’t have to spend your vacation time prepping and cooking food – simply throw a frozen meal into the skillet and heat it up.
Eat the Most Perishable Foods First
If you know you won’t be able to get more ice during the course of your camping trip, plan to eat the most perishable items first, like meat, eggs, and dairy. That way you’ll enjoy those items while they are definitely still cold enough to be safe, and you can save your other less critical foods (veggies, etc.) for later meals.
Bring Non-Perishables
And finally, it’s always a good idea to have plenty of non-perishables packed as well. That way you won’t be left high and dry if you have a catastrophic cooler failure. And, even the best cooler will reach its limits eventually, so if you’ll be camping for a very long time, you may eventually have to resort completely to non-perishables.
There are many different methods for how to keep food cold for a week of camping, but these are some of the best tried and true tips. With a little planning ahead, you can certainly have fresh food and cold drinks for the duration of your trip.
Up Next In Camping:
What to do on a Rainy Day While Camping?
What Food Should I Bring for 3 Days Camping?
No-Cook Camping Meals: 21 Tasty Ideas
22 Dollar Tree Camping Essentials


Cat is originally from Seattle, WA but has traveled around the US and Canada full-time in a self-converted school bus with her boyfriend Aaron since April of 2018. She enjoys rock climbing, paddleboarding, hiking, and generally being outdoors!