
Converting a school bus into a tiny home on wheels is, without a doubt, a huge job. It requires you to wear many hats: demolition crew, engineer, construction worker, interior designer, plumber, electrician, painter, problem solver – the list goes on.
Fortunately, there are many resources available now to help you through the process. In this article specifically, I and a few of my fellow skoolie owner friends will be sharing our top tips for what to know before building a skoolie.
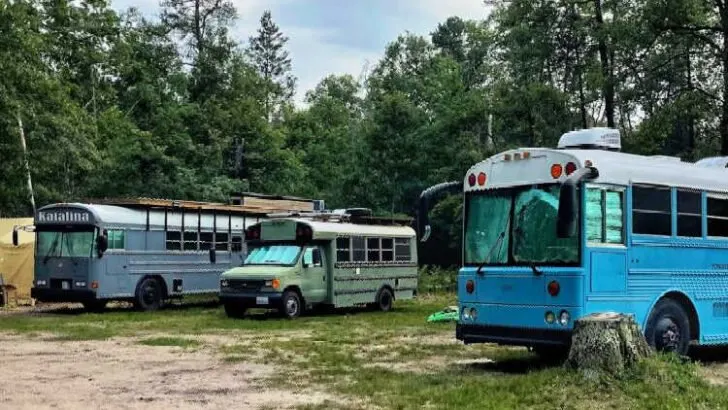
My boyfriend Aaron and I bought our 22-foot bus (@stu.the.bus) in August of 2017 and spent the next 8 months converting it – although we had full-time jobs for the first 6 months of that time.
We had no experience doing anything like this before, but we were extremely fortunate to have help from our family and friends, who contributed their expertise and time in fields like construction, finish carpentry, upholstery sewing, custom curtain making, electrical, and of course, moral support.


We have now been on the road for over three years. Although it was an astronomical amount of work, we couldn’t be happier with our decision to build out a skoolie and we are starting to get the itch to possibly convert another vehicle (eventually, maybe, we’ll see haha).
What to know before building a skoolie? My top 8 tips:
Make Lists
I still have a master list saved on my phone that has over 120 line items on it, which isn’t even close to the total number of individual tasks that went into the bus build – mostly to remind myself how much work it was the first time around in case I get any crazy ideas about doing this again! I’m mostly kidding.
Having everything on a list helped me stay organized, ensured that things got done in the appropriate order, and gave me the satisfaction of being able to check things off as they were completed. There wasn’t always visible or tangible progress made on the bus every day, so the list served to remind me that we were still accomplishing things.
In fact, I recommend having several different categories in the list: things to buy, things to do on the bus, and administrative things to do before hitting the road (insurance, registration, sell your extra stuff, etc.). It helped prevent complete and utter overwhelm!
Test Drive Several Buses Before You Buy One
I’ve seen a devastatingly high number of Instagram posts lately from people who have finally completed their skoolie conversions after months of hard work, and they excitedly hit the road only to have something go very wrong with the bus itself.
While of course there’s no absolute way to prevent this from happening, you can take some steps to try to avoid such a catastrophe. If you’re anything like us, you’ve probably never driven a school bus before, let alone a diesel vehicle, or even anything bigger than a car.
It takes practice and some getting used to. I for one nearly had a heart attack the first time the engine fan came on, convinced that the engine was about to blow up. The more you know…
All of this to say, test drive as many buses as you can get your hands on to help you get a feel for what’s normal and what’s not. We test drove one bus that positively billowed black smoke out of the exhaust and the sleazy used car salesman tried to tell us that all diesels do that. Umm, no.
Keep in mind that if the bus you are test driving sounds like it’s really trying hard to get up a hill when it’s empty, it’s going to seriously struggle once you load it down with the weight of your build. Which leads me to…
Be Mindful of Your Build Weight
I won’t name names here but I once saw posts on Instagram of some people who built out a bus with insane features like tiling throughout, granite countertops, a wood-fired pizza oven, a billion gallons of water, and so forth. It looked stunning, but at the end of the build, the thing literally couldn’t even move because it was so heavy.
So, check the weight rating of the bus/axles/engine before you begin and keep it in mind as you go.
Strip Your Bus Down Completely
This is a “do as I say, not as I do” situation. We took out the seats, rear heater, and horrible flooring – but that’s it. We kept our stock ceiling because it was in good shape and frankly, we didn’t want to remove a thousand screws. Then we had a hell of a time later once we decided to add recessed lights in our ceiling.
We also didn’t add any significant amount of insulation to the walls, ceiling, or floor, mainly because Aaron could barely stand straight up inside as it was so we didn’t want to lose any vertical space. And since we kept all of our original windows, we didn’t feel that adding tons of insulation would even make a difference since the main culprit letting in the heat and cold was the windows.
I’m still convinced this is the case, and if we do another build, we will probably opt for a roof raise and replace the bus windows with double-pane RV windows in addition to insulating more fully.
Gutting the bus completely also makes it easier to identify wires that you need and those that can be removed, and you can plan and integrate your electrical and plumbing systems more seamlessly, as some of my friends also recommend below.
Go As Small As Possible
I know several people who have started with mid-size or full-size buses, only to realize after they get on the road that they don’t need that much space and they wish they had a smaller bus that is more maneuverable, more fuel efficient, easier to park, etc.
There are certainly times when I wish we had a few more feet of interior space, but at the end of the day we love being able to fit into a single parking space (if we can hang the butt over the curb).
Obviously, if you’ll have kids with you in the bus, more space will be required and you may opt to have a tow car for excursions instead. But, if your goal is to get off the beaten path as much as possible, I would recommend selecting the smallest possible bus for your needs.
Measure Your Household Stuff for Reference
Unless you work in construction or furniture design, it’s unlikely that you know off the top of your head how tall countertops should be or how high off the ground to make the seat of your couch. We had no idea either.
So, we measured everything that we liked about our apartment before we moved out, from the counter height and depth to the seat height and back angle of our couch. We’ve spent some time in bus conversions where the couch was so far off the ground that our feet were dangling – not comfy.
Build in Storage Everywhere
Maybe it’s just me, but clutter stresses me out to the point where I can’t even focus if I’m trying to work. As such, we were a bit fanatical about using every possible square inch of extra space for storage so that everything has a home and can be stashed away shipshape. In such a tiny bus, it takes like one thing being out of place for the whole bus to feel messy.
Take Deep Breaths and Ask For Help
Things will probably go wrong. You might get to the plumbing portion of your build and realize you have no clue how to hook everything up. You’ll make approximately a million trips to the hardware store.
The bus will eventually break down in some way. Fortunately, there’s a whole community of skoolie owners who are here for you and ready to help – whether it’s advice, encouragement, a cold beer, or a few bucks on Venmo after your first trip to the mechanic.
The biggest piece of advice I can give you is when something goes wrong with the build or out on the road, take a deep breath, don’t panic, don’t give up, and know that you’ll eventually figure out a solution or find someone who can help you.
Now, enough from me. I also talked with a few of my skoolie owner friends who generously shared their tips and expertise…
J and Eric’s Top Things to Know Before Building a Skoolie


First, I talked with J and Eric (@campaldape) about their gorgeous 28-foot bus conversion. Their build took them 10.5 months of full-time work to be road-ready, and they have been traveling full-time for 6 months.
However, as any skoolie owner knows, a bus is never truly 100% finished, so they are still working on several bus projects currently, including adding an awning, an outdoor table on the side of the bus, a cell booster, and window screens. Here are their top tips for converting a bus:
“So you’ve bought a skoolie or are thinking of buying a skoolie. You’ve been looking at all the amazing photos of finished builds online and cannot wait to start your own. However, the idea of ripping out all the seats, framing, insulating, building walls/plumbing/electrical, and then finishing the build to look like a home is super overwhelming.
To add to the stress, I can tell you firsthand that everything is going to take much longer than you think and cost more than you budgeted. But don’t fret, you are joining one of the most amazing communities, and there are so many great tips and video tutorials available at your fingertips.
Here are our top 3 tips:
Do The Research
Do your research! Watch videos online and see how other people have done things. After you have watched a few videos, watch a few more. It was helpful for us to see how different people tackled different problems. You can pick up tips and tricks about all kinds of things from paint prepping, to demolition work, to furniture building.
We were able to take different ideas from different videos that we liked and combined them to make it work for us and our bus. Most of our early days were spent watching video after video. Sometimes we watched the same video numerous times in order to fully feel ready to start a particular project.
Plan The Layout
From your research you should have a good understanding of the three common systems that will operate in your bus before you start framing and insulating. The systems that most people install are water, gas, and electrical. These systems can be complicated and have many different parts.
Most of the time, you will need to run your pipes, gas lines, or electrical wires behind walls, under counter tops, and hidden in the ceiling. Having a blueprint or layout of everything you want to install can save you time, money, and headaches. You don’t want to build a wall or put up ceiling panels only to then have to run wires or pipes behind them.
Take your time and think through your options and decide where you want to have your sink, stove, lights, and light switches. Proper planning will lead to a successful skoolie build.
Consider The Packing
Now that all the hard work of building the bus is complete, one of our favorite features is that we are drive-ready at any given moment. From Velcro seat belts around our espresso machine, to screws and washers anchoring baskets on the floating shelf, to double-sided silicone tape holding down the plant pots, everything has its place.
We also consciously left some spaces empty. Empty baskets on top the floating shelf, extra space underneath the bed, and floor space under the bar/work counter top. These ‘empty’ spaces are invaluable. Not only does it make the skoolie feel less cluttered but also gives us space to put the extra groceries, the extra cooler, or the extra firewood.
Bonus Tip: Be Present
This life, for us, is about slowing down and being present in the moment. This concept applies during the build too. I know you’re excited to have a finished skoolie and hit the road, but slow down and enjoy what you are doing today and the small victories (or set-backs). You are building your future home and that is pretty amazing. The sweat and tears are all worth it.”
Ashley and Chris’s Top Things to Know Before Building a Skoolie


I also spoke with Ashley and Chris (@spastic_nomadics), who spent 6 months converting an incredible 38-foot school bus and have lived in it for 6 months so far. They are currently in the process of converting an even larger 45-foot coach bus, so they certainly know a thing or two about bus conversions!
Here’s what they had to share:
“Chris’s advice:
- Work from the outside of the bus in. Get your solar, tanks, and so forth set up, then move inside to work.
- Finish each step/section before moving on to the next.
- Plan the utilities layout first to make sure your interior layout will work!
Ashley’s advice:
- I would say to think about bathroom placement. Our toilet is right across from the bunks and I feel strange using it while someone is asleep so close.
- Plan for fans. You’ll generally need some air movement.
- And last but not least, enjoy your build time. It’s such a special, unique time in our lives!”
Gillian’s Top Things to Know Before Building a Skoolie


Finally, I caught up with Gillian (@junglethebus), who’s been traveling for a year, using her beautiful bus as a hub for her mobile shop Jungle Jawn. She sells gorgeous handmade goods as well as a selection of curated vintage clothing and household items.
Here’s what she shared:
“Aloha future nomads, Gillian here! I’ve been a full-time bus-living nomad since February 7th, 2020. I purchased my bus back in August ‘19 and started my self-conversion in October ’19. It took about 4 months to convert. For the first few months of full-time living, I was stationary in East LA working on little projects to really finish the bus and make it feel like home.
My road journey was postponed until August ‘20 due to the pandemic and uncertainty of the world. But I’m happy to say that I’ve officially been on the road traveling now for 1 year and living full-time in Jungle for 1.5 years. Jungle’s build is a self-conversion but I was lucky to have help from a few friends along the way – sometimes two hands just don’t cut it.
My tips:
- Invest in a Kreg pocket hole jig (not sponsored). I wish I invested earlier in this tool, it’s really a game-changer. Watch a few YouTube videos on how to use it if you aren’t tool savvy.
- Use Facebook, Craigslist, 5miles, OfferUp and other second-hand apps to find stove/ovens, water tanks, fridges, etc. Things add up fast and every penny counts.
- When looking at buses, always look underneath for rust and possible trouble areas. Buying a bus from a drier climate is always ideal with less of a chance for rust damage.
- For sealing up exterior roof seams from your fan, solar, etc., use a Lap Sealant. I’ve learned the hard way that the other stuff just won’t cut it. Lap Sealant levels out and really slides into any possible spots that might pose leak problems.
- When planning out your build, make sure if you are covering/building over electrical areas that you leave a way to access them easily. So, if a problem arises, you wont need to fully disassemble your build in that area.
- Most Importantly: Always take a moment to step back and give yourself credit. This life isn’t always sunsets and waterfalls and building out your rig will test you in ways you might not have been ready for. But let me tell you, the Juice is Worth the Squeeze and you will grow in ways you probably never even thought possible.”
Closing Thoughts
Hopefully these tips have been helpful to you and provided some inspiration and encouragement. Building a skoolie is a big job, but so many people have done it at this point that you can find a resource or tutorial for nearly anything you might need to know.
Have specific questions? Please feel free to reach out to me personally on Instagram messenger at @stu.the.bus. Enjoy your bus conversion and best of luck!
Up Next In School Bus Conversions:
Do You Need a CDL to Drive a Skoolie? (Bus Conversion FAQs)
10 Most Common Skoolie Conversion Mistakes
Skoolie Floor Plans: 4 Steps to YOUR Perfect Design
School Bus Conversion Companies: 10 Crowd Favorites


Cat is originally from Seattle, WA but has traveled around the US and Canada full-time in a self-converted school bus with her boyfriend Aaron since April of 2018. She enjoys rock climbing, paddleboarding, hiking, and generally being outdoors!