
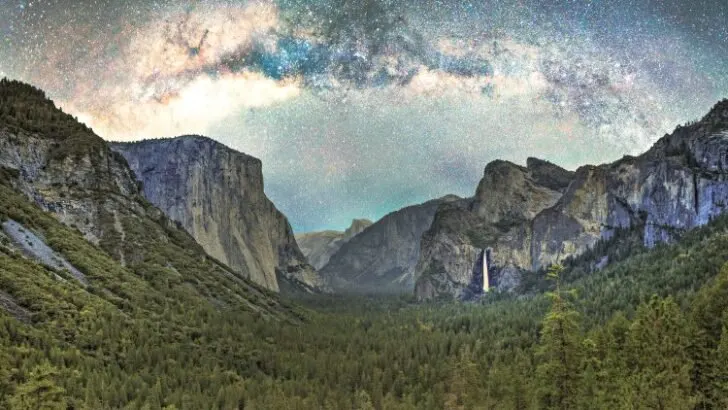
Yosemite is is a paradise for outdoor enthusiasts of all calibers. With its ancient sequoia trees, the iconic Bridalveil Falls and majestic granite cliffs of Half Dome and El Capitan, there are so many wonders to enjoy. With over 800 miles of trails in the National Park, it entices thousands of holiday-makers, amateur hikers and expert backpackers to its myriad of routes.
Backpackers should pay special attention to bear and fire guidelines – which help keep the park and its inhabitants pristine and protected.
So, you think you have what it takes to backpack Yosemite? Many people will simply stick to the popular “bucket-list” routes and viewpoints, but here we’ve rounded up some of the more daring and off-the-beaten-track routes for you to test your metal.
It is always advised to plan several back-ups and alternatives, in case you don’t secure a permit for your chosen trail or external circumstances affect your plans. A great place to get further, detailed information from other backpackers is AllTrails.com (Download the app, it is a backpacker’s best friend)
Let’s dive into the list!
Here’s our top 7 recommended Yosemite backpacking trips:
1. Best of Yosemite’s Summits
This trail will take you right to the summit of both Half Dome and Cloud’s Rest. You’ll see spectacular views of some of the park’s most well loved spots, and encounter many impressive geographical features. Starting at the Sunrise Lakes trailhead, you’ll pass Tenaya Lake, the two unmissable peaks and the impressive Nevada and Vernal falls.
Difficulty: Hard
This route can be done a few ways but expect to spend four days walking and five nights camping. With a few thousand feet of elevation loss and gain, backpackers should have experience on multi-day hikes and be comfortable in their gear. What – you thought summiting Yosemite’s top peaks would be easy?! Make sure to come prepared and in shape.
Parking: Park at the trailhead, there’s a lot for a dozen cars or so. Alternatively, take the shuttle from Yosemite Valley to the trailhead directly. Note: this trail ends in Yosemite Valley so if you park at the trailhead you will need to get the shuttle back there to retrieve your vehicle.
Permits: Wilderness permits are required for every night on the trail. Half Dome permit required.
Trailhead location: Sunrise Lakes Trailhead.
Type of trail: Point-to-point. Starts at Sunrise Lakes Trailhead and ends in Yosemite Valley.
Length of route: Around 20 miles.
Number of days: 4
Elevation gain/loss: +3,300 ft / -5,600 ft
Perfect for: Experienced, intrepid backpackers!
Best Season: Summer/ Fall
Trails covered: Sunrise Lakes, Forsythe, Cloud’s Rest, John Muir, Half Dome, Mist. Make sure you research and obtain the necessary permits and have a couple of alternative options ready.
Extra information: Black bears are prevalent along this route. They do not generally pose a threat to backpackers, but it is essential that you follow the park’s guidelines for storing food and waste, to avoid unwanted visitors in the night!
Here are our recommended campsites:
- Night one – Backpackers Camp in Yosemite Valley
- Night two – Sunrise Lakes
- Nights three and four – Cloud’s Rest or JMT junction at Sunrise Creek
More info/trip report: outdooradventureclub.com
2. Little Yosemite Valley and Half Dome
This is the perfect overnight option for anyone who wants to get up early and beat the Half Dome crowds. The trail starts at the Happy Isles trailhead, and camping is situated next to a serene river, where you can restock water and relax in the soft sunset light before an early start. Your hike will take you past two waterfalls, ultimately leading to top-rated views of the park from Half Dome.
Difficulty: Moderate to Hard
The hike to Little Yosemite Valley isn’t too difficult, but the steep climb to the top of Half Dome will put most backpackers through their paces. The near-vertical section named “The Cables” features two steel cables which you use to pull yourself 400 ft to the top. Depending on your fitness and affinity to heights… this will either be your best or worst part of the trail!
Parking: Park at Upper Pines parking lot
Permits: A wilderness pass will be needed for your overnight stay, plus a pass for Half Dome.
Trailhead: Happy Isles Trailhead
Type of trail: Out-and-back
Length of route: 15 miles
Number of days: 2 days
Elevation gain/loss: 4,300 ft
Perfect for: backpackers with a good level of experience.
Best Season: Late Summer/ Fall
Trails covered: Happy Isles and Mist trails, as well as Half Dome ascent. Make sure you have the necessary permits for camping and ascending.
Extra information: The beginning of the trail will be more heavily populated, but the crowds will taper off as you approach the campsite. Make sure that your food is properly secured and bear-proof, as there are numerous black bears around the valley. Campfires are permitted in the designated zones, and campers are permitted to collect dead, downed wood smaller than their forearm to use as firewood. Get up early to beat the masses ascending Half Dome!
More info/trip report: tripadvisor.com
3. Cathedral Lakes
This trail is quite the opposite to the intense, crowded scramble offered by Half Dome. An 8 mile round trip, this can easily be completed in a day and you will have the chance to soak in the glory of the 10,900 ft Cathedral Peak. The trail winds through High Sierra forest, abundant with pine trees and large granite boulders. Finally, you’ll reach Cathedral Lakes: two high alpine lakes surrounded by picturesque meadows.
Difficulty: Easy
This is a pleasant day hike for those who enjoy solitude and pristine environment. At just over 1,000 ft gain there is a still a good level of fitness required, but start early and pace yourself and you’ll have plenty of time to hike out-and-back in a day.
Parking: Tuolumne Meadows parking lot.
Permits: None needed for day hike. Wilderness permit for overnight camping.
Trailhead: Cathedral Lakes Trailhead
Type of trail: Out-and-back
Length of route: 8 miles
Number of days: 1 day (4-6 hours) or spread over 2 days.
Elevation gain/loss: 1,100 ft
Perfect for: Beginners and photography enthusiasts
Best Season: Year-round (however, you should check trail availability in the winter months as they are subject to close.)
Trails covered: Cathedral Meadows Trail. No permits needed for day hikes.
Extra information: Photography enthusiasts will want to plan their hike later in the day: this is a beautiful spot for capturing the evening light glowing on Cathedral Peak. Just be sure to plan to arrive back at your car before dark! Alternatively, plan to do this trail over two days to capture the evening light. Just make sure you obtain a wilderness permit in advance.
More info/trip report: modernhiker.com
4. High Sierra Loop
If you love exploring impressive peaks then this route is for you. Explore Yosemite’s high points in this High Sierra Loop. You’ll start in the flower-laden Tuolumne Meadows and climb into the Cathedral Range, pass various alpine lakes, traverse the famous John Muir and Pacific Crest Trails in just a few days. These ancient landscapes have been carved by glaciers and they will be sure to take your breath away.
Difficulty: Moderate to Hard
This route takes you up and into some remarkable alpine country, and takes a few days to complete. There is an excellent route description and tips on All Trails.
Parking: Tuolmne Meadows
Permits: Wilderness permits for overnight camping.
Trailhead: Tuolumne Meadows Wilderness Permit Station.
Type of trail: Circuit
Length of route: 19.5 miles
Number of days: 3 or 4 days
Elevation gain/loss: 2,250 ft
Perfect for: Experienced backpackers, high-mountain lovers.
Best Season: Summer/ Fall
Trails covered: John Muir, Ireland Lake, Pacific Crest
Extra information: You can do this independently: carrying all of your gear, or opt to stay in Yosemite’s High Sierra Camps where you’ll be provided meals and shelter (in-season).
More info/trip report: yosemite.ca.us
5. Dewey Point from Tunnel View
Tunnel View is one of Yosemite’s most famous vistas, offering the classic view down Yosemite Valley with El Capitan and Bridalveil Fall. Turn your back on the crowds and head down Pohono Trail, spending a night a Dewey Point. This route will enable you to take it slow, soak in the sights and watch the famous Yosemite sunset illuminate the sky.
Many backpackers leave this trail claiming they had the camping spot to themselves, and it is a famous among photographers wanting to capture the night sky in peace.
Difficulty: Moderate to Hard
With almost 3,000 ft elevation gain in just a few miles, this route is not for the faint-hearted. Start early enough, however, and there’s no reason why even the more inexperienced can’t enjoy this spectacular trail.
Parking: Tunnel View
Permits: Wilderness permit for overnight camping.
Trailhead: Tunnel View/ Pohono Trailhead
Type of trail: Out and Back
Length of route: 9.3 miles
Number of days: 2 days
Elevation gain/loss: 3,000 ft
Perfect for: Experienced backpackers. Nightscape photographers.
Best Season: Summer/ Fall
Trails covered: Pohono Trail
Extra information: There is often an abundance of dry wood to use for a campfire at Dewey Point, one of the reasons this is such a top-rated spot. Please take extra care to extinguish any fires, and do not burn trash anywhere in the park.
Also consider hiking up to Taft Point before returning to Tunnel View for a different perspective of the valley.
More info/trip report: sierranewsonline.com
6. Tuolumne River Canyon
Labeled as one of John Muir’s classic pioneering trails, this route is truly one of the park’s best. After experiencing the lush Tuolumne meadows, prepare to descend deeper and deeper into the canyon, putting those knees to the test. You’ll pass the famous Glen Aulin and be faced with some seriously impressive towering granite walls.
Difficulty: Hard
Backpacking in and out of canyons is always a strenuous activity. This route is no different. The first three days will see a steady descent into the canyon with only minor portions of uphill – but day 4 requires a 3,700 ft gain to get you back out again!
Parking: Tuolumne Meadows
Permits: Wilderness permits for overnight camping.
Trailhead: Glen Aulin Trailhead
Type of trail: Circuit
Length of route: 29.3 miles
Number of days: 4 days
Elevation gain/loss: +5,000 ft, -5,500 ft
Perfect for: Experienced backpackers. Those with strong knees!
Best Season: Summer/ Fall
Trails covered: Glen Aulin, John Muir
Extra Information: The end of the trail spits you out back on Tioga Road/ Route 120 – a little way from where your car is parked.
Here are our recommended campsites for this route:
- Night one – Glen Aulin Backpacker’s camp
- Night two – Above Muir Gorge
- Night three – Pate Valley
More info/trip report: acauseforadventure.com
7. Ten Lakes Basin
This is the perfect short backpacking trip for solo hikers or groups. Some of Yosemite’s best lakeside camping and breathtaking views of the high sierra await at the end of your first day. Early risers can also scramble back up the ridgeline on their second day for spectacular sunrise views.
Difficulty: Easy to Moderate
The beginning of this trail is a fairly strenuous uphill grind to Ten Lakes Pass, before a steep downhill into the basin of the lakes. It can be completed in one day if needs must, but we recommend taking two to take full advantage of the stunning views and wild-swimming opportunities.
Parking: Ten Lakes
Permits: Wilderness permits for overnight camping.
Trailhead: Ten Lakes Trailhead
Type of trail: Out-and-back
Length of route: 13.8 miles
Number of days: 2 days
Elevation gain/loss: 2,200 ft
Perfect for: All levels.
Best Season: Year-round (however, you should check trail availability in the winter months as they are subject to close.)
Trails covered: Ten Lakes Trail
Extra information: The official trail passes by the two largest lakes, but some backpackers will opt to head off-trail and find their perfect spot. Please be extra cautious when venturing off-trail and always ensure you know your route back.
More info/trip report: backpackinglight.com
How to obtain Yosemite wilderness permits
Due to its popularity, permits must be obtained for any overnight stay in Yosemite, backpacking or otherwise. Day hikers do not require a permit; with the exception of Half Dome. Wilderness permits can be applied for in advance – and this is highly recommended – as the popular trailheads can fill up on the first day that reservations open.
Reservations will cost you $5 each one, and can be applied for 28 weeks in advance of your start date. There are a number of permits left on a “first come first served” basis on the day – but this is leaving it somewhat to chance, and means you may not be able to backpack your chosen trail.
- Don’t try to camp without a permit – Wilderness camping needs to be regulated in Yosemite due to its vast size, huge popularity and difficulty of terrain. Not only will you face a fine if you are caught without a permit, it may take emergency services longer to find you if something happens to you on the trail – especially if you are hiking alone.
- Don’t be disheartened if you don’t get a permit! Some of the major trails fill up incredibly quickly, but that doesn’t mean that you should be dismayed. There are so many trails to enjoy in the park, and you always have the option to try your luck at the permit stations on the day. Plan well in advance, stay flexible, make several back-up plans and you’ll have the Yosemite trip of a lifetime.
For full information on permits, read the official guidance.
So there you have it: our round-up of seven top backpacking routes for Yosemite. The park has an abundance of trails for hikers to enjoy and it truly is a nature-lovers paradise. The incredible range in geography, wildlife and flora cements its place as one of the world’s top outdoor locations. Just make sure you book those permits well in advance to avoid disappointment.
Up Next In Yosemite:
How To Spend ONE Day In Yosemite (detailed itinerary)
Where to Swim at Yosemite – Pools, Lakes and Rivers
Can El Capitan Be Hiked? Yes! Here’s How
Hiking Half Dome – Cables, Deaths and FAQs


Suzie Hall has a passion for all things wild and is a scuba diver and Orcalab researcher based in Hanson Island off the north coast of Vancouver Island, British Columbia. She spends most of her time exploring this great wide earth and her travels have taken her to some remarkable locations including Patagonia, Kyrgyzstan and the wild British Columbia coast. Fueled by a drive to protect our wild spaces and their inhabitants, Suzie works in conservation projects around the globe and lives to write about the amazing people, places and wildlife she encounters.
Leave a comment
You must be logged in to post a comment.