As living and travelling in a van becomes increasingly popular, more and more people are deciding to do their own van conversion rather than buying a ‘ready made’ adventure vehicle. By converting your own van, you can be certain that your vehicle is designed to meet your personal needs and fits in to the lifestyle that you are trying to create.
Some people prefer to spend a couple of years creating a YouTube-worthy tiny apartment on wheels, whereas others will spend a couple of days throwing together some camping kit and live with the barest essentials. After all, you will always find more work that needs to be done, so it’s easy to end up fantasizing about your adventures indefinitely as you fritter away time in the workshop and don’t get any closer to your travel goals.
So, how long does it take to convert a van into a campervan? A DIY van conversion can take anywhere from 3 weeks to 3 years, depending on your experience, the tools available, your competing commitments and your vision for the build.
In this article we will take a look at several van to campervan conversion owners and ask them how long their builds took. This should provide you with some good, real life examples to help you plan your own!
Our van to campervan conversion took 7 months
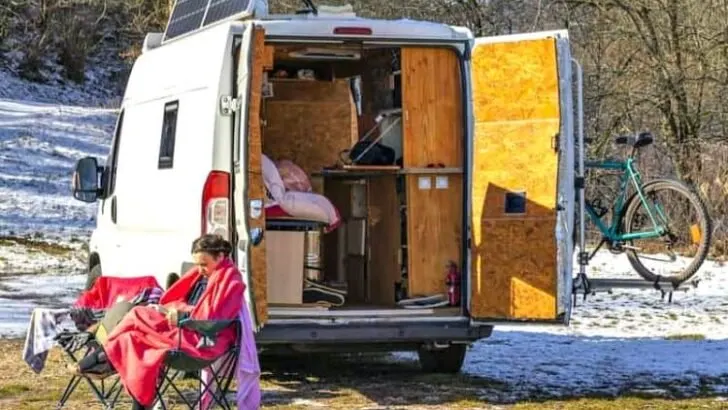
Our van (featured image above – @florianroquais) build took 7 months from the moment we decided to live in the van to the moment that we set off on the road. We were hitchhiking and living in a tent in rainy Scotland, so we had already gone through the process of leaving behind a conventional lifestyle.
Eating lukewarm oatmeal on a bleak cliff top with horizontal rain pelting against our faces, we did not need much convincing to have a warm and dry place to call our own.
Step 1 – Buying the van
A crucial step that people often forget to leave time for is finding the perfect vehicle. It took us 2 months of searching before we found a vehicle with the mileage and specs that we wanted. Whilst we were searching, we did lots of research, checking out other van builds and drawing up detailed plans.
We had to increase our initial budget of $9,000 to $14,000 and bought a 2012 Peugeot Boxer with 60,000 miles on the odometer. We could have bought a cheaper vehicle and held onto some savings, but we did not want to risk investing all our money into an interior just to see the van itself breakdown.
Step 2 – Preparation
Do not forget to do some simple preparation to improve the longevity of your van. We spent a few days unscrewing all the internal panels and deep cleaning the dust and dirt out of every nook and cranny. After this we could paint the interior with a couple of coats of protective solution to prevent rusting.
Step 3 – Windows
We installed 4 windows: one on each side panel, one at the back door and a skylight on the roof. As our van is only 5.4 meters, plenty of natural light helps the space to feel less claustrophobic. The window installation only took about a week as a family member loaned us the perfect tools. Each window had to be carefully sealed and we installed a system which provides both a shutter and a fly net over the window depending which way you set it.
Step 4 – Insulation
Decent insulation was a high priority for us because we would be living in the van full time and regularly camping out in freezing conditions. It makes us cringe when we see van conversions with huge windows and sub-par insulation and cannot imagine how much more expensive the heating and cooling bills would be. This step added around 3 weeks to the build.
Step 5 – Electric
Florian is a qualified electrician, so he got quite carried away with more lighting settings, plug sockets and USB ports than we could ever dream of using. He installed 2 solar panels on the roof of the van, providing 260 watts in total. He connected these to two 110-amp hour batteries and used them to run the pump for the kitchen tap and the L.E.D lighting. This stage took around 1 month to complete.
Step 6 – Plumbing
We installed a basic plumbing system using 30 liter water tanks and a simple water pump which is switched on and off by the tap. For a shower we purchased a simple solar camping shower which can be left in the sun to heat up and installed a shower base with a tray underneath it which can be slid out to empty. The simple approach meant that the plumbing only took a few days.
Step 7 – Furnishing
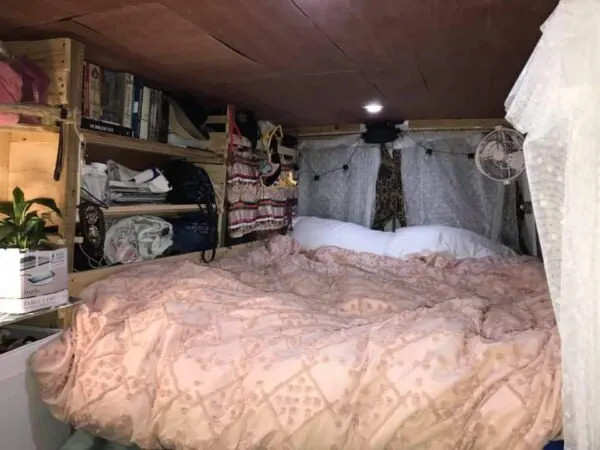
We made all our furniture by hand including storage under the bed, fold down tables, kitchen units and even the sliding bed frame. Making it by hand took a lot longer but both saved us money and meant we could stick by our low-impact values and recycle old materials. The furnishing took around 3 weeks to complete.
Step 8 – Government Permitting
To ensure the van would be road legal we had to change the tires to high spec winter tires, build a cupboard with air vents to store the gas, purchase fire extinguishers and submit detailed plans for approval by the authorities.
This isn’t necessary in all countries, but we did the conversion in France which is famous for its love of rules and regulations. It took 3 weeks to get an appointment with the local council, but we passed the permitting process on the first take and were finally ready to hit the road.

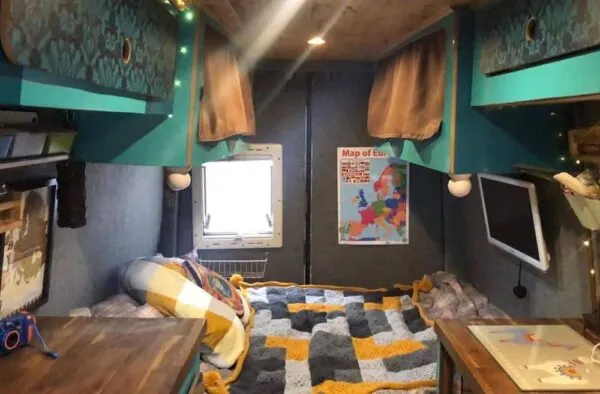
Interior of our campervan build
How long some fellow vanlifers took to convert their vans
I spoke to several fellow vanlifers to find our how long their van conversions took. From a few weeks to a few years, the answers were extremely varied!
Pete Russell (3 weeks)
Pete (@whitevanfamily) took just 3 weeks to convert his van into a family home which, incredibly, he was also working his job for more than half of that time. He installed his own windows, roof vent and solar powered electrics with led lighting, a water pump, USB points, inverter and even a TV!
He used a refillable gas tank to power the oven and hob and opted for a diesel heater. I asked him which corners he cut in order to make this crazy deadline possible, but he even insulated the van properly! The van offers the perfect rolling home for this young family.

‘I knew what I wanted before I started, had the layout ready, knew what I’d need and got it all ordered. I think what saved us time was not having decisions to make during the process.’
Bradley Arthur (2 months)
Bradley (@skittlesseventytwo) spent around 2 months converting his ’04 Sprinter, working on it full time. Although he has installed good insulation and a solar powered electric system with a 2,000 watt inverter, he decided not to install a sink or plumbing.

‘We manage just fine, using our gym memberships for showers.’
Kai Branss (6 months)
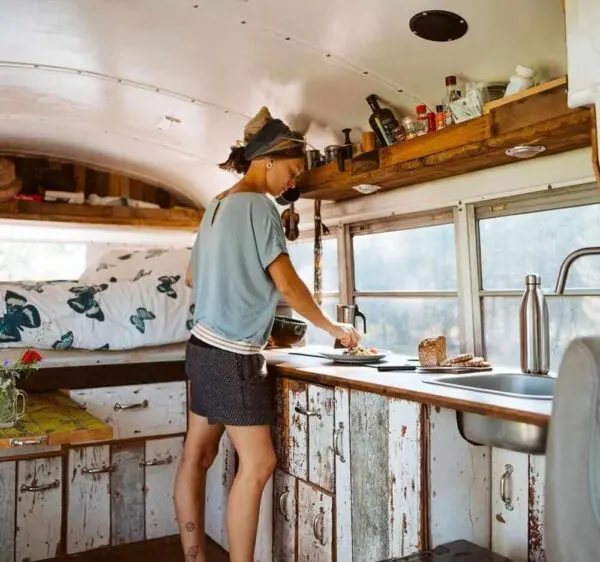
The popular vanlife duo of @wetravelbybus spent around 6 months building their stunning school bus conversion with it’s own log fire and exceptionally beautiful, rustic interior. If he were to embark on another van conversion, Kai would concentrate more of the technical side of things like de-rusting, checking the engine and perfecting the wiring system.


‘It’s so much easier to reach all that stuff before you build the inside’
Jess and John (13 months)
Jess and John (@dwnshifters) spent around 9 months on the design phase of their 2019 Ford Transit High Roof Extended alone. As John is an architectural and product designer, the front end of the project took a long time as they worked out the layout with computer models and even a working 3D model.
They felt they saved a lot of time and money down the road and will pay off in abundance in the long run, avoiding burnouts and breakdowns in the many years they plan to stay in the van.
Taking their time also meant they could downsize to their previous home to the van in plenty of time, finding good homes for their old stuff and not just sending their things to landfill.The outcome of all this careful planning is a really exceptional van build and they continue to share their knowledge on their website: dwnshifters.com

‘If you have the luxury of converting the van before moving in, it makes sense to take your time. You will save money and resources by not redoing the same components over and over.’
Lydia and Gelly (16 months)
Lydia and Gelly (@nellys_adventures) ignored the common advice to avoid an LDV and set about converting their LDV Maxus 17 seat minivan. They are thrilled with the conversion and say the Maxus turned out to be extremely solid and reliable.
They took very few shortcuts but said that buying a wiring loom was extremely helpful and were glad that the minibus (fondly known as Nelly) already had windows installed.
The conversion took 16 months, partly because they had employment and university commitments to balance with their conversion.They suggest that prospective buyers consider minibuses as they are often very well cared for and have a lower mileage for the price. They also encourage people without a big workshop not to be put off, as they built their conversion in their drive.

‘All you need is a space to park and some imagination!’
Time-frame for a professional van conversion company
For those who lack the experience or free time to do their own conversion but would still like to design their own interior, going through a professional van conversion company can be a perfect solution. For example, California based RB Components can put together a simple build in as little as 2-4 weeks, although their signature builds take more like 8-12 weeks.
Customers can approach RB Components with their chosen van, or get help finding the perfect vehicle using the network of partnerships that the company has built up over many years of doing business.

Conversion by RB Components
The team at Portland based Outside Van have an average turnaround time of 8-12 weeks after the van pulls into the workshop. Just like with RB Components, Outside Van offer you the chance to be fully involved in the design process.
They know that most vanlifers seek stunning, remote locations and have the expertise and commitment to quality to make sure you can do so without worrying about a breakdown in your heating, water or electrical systems.
Final Thoughts
The length of your van conversion totally depends on your own needs and preferences. Those going off grid may well want to put in extra features like a shower or toilet system but those who are staying in caravan parks might not have any need for them.
Be careful about getting too wrapped up in the tiny details because you could spend a lifetime trying to perfect the van and never actually get out there to enjoy it. Then again, the more time you invest up front could mean saving you a lot of time and effort in the long run.
Remember, you’ll always find more things you want to improve and fix along the road so bring along some tools to keep you entertained on a rainy day.
Up Next In Vanlife:
Saving for Vanlife (How Much You’ll Need)
How do you Insulate a Van Conversion? (7 Best Materials + Our Experience)
How can I Heat my Van in the Winter?
10 Best Sprinter Van Conversion Companies
Rachel is a full-time traveller, living in her self converted Peugeot Boxer transit van with her partner. Powered by solar panels and a lot of love, she travels slowly around the most beautiful places of Europe. She spends her days hiking, wild-swimming and long boarding down the oceanfront. Her blog can be found at www.highlysensitivenomad.com


Leave a comment
You must be logged in to post a comment.