
If you intend on backpacking, then the amount of water to carry will be one of your biggest issues to figure out before you depart. On one hand you don’t want to carry an excess because of the weight. On the other, you want to stay safe and have plenty of fluids for your body to continue with all day efforts. So, here’s the formula I use to determine how much water to bring backpacking…
You should carry 1 liter of water for every 2 hours of backpacking you have ahead of you. Of course, adjust this for your specific situation. Consider your age, the intensity of the hike, your personal sweat rate, body type, duration of the hike, the weather, and the distance.
One liter of water weighs about 2.2 pounds. But don’t get caught up in being ultra-light if you need the water. You will be ultra-in-trouble if you are without enough water to keep your energy up and mind strong. Also factor in weather. In hot, humid, or dry weather, expect to increase you water intake. Plan for an extra liter per an hour.
Additional variables to consider in the equation:
- distance (5 miles or 25 miles)
- time (a day hike, weekend overnight, or a 20-day hike)
- backpack weight (the essentials, some layers, and a snack, or a tent and a bear keg)
- trail difficulty
- altitude
- elevation gain
- personal abilities
- group abilities/dynamics (children, adults, experienced, novice, fitness, goals and expectations, etc.)
After applying the general, the “how” becomes personal preference.
The Equation – Use time in the equation rather than distance. Trail difficulty and elevation changes are not accounted for in time. The average adult walks a 20-minute mile. Add an extra hour for every 1000 feet of elevation gain. Add an extra half-hour to an hour of margin time (accounting for wildlife siting, snack breaks, water breaks, view intakes, injuries, etc.).
Example: 6-mile hike with an elevation gain of 500 feet
Equation: 6 miles x 20 minutes = 2 hours of hiking = 1 liter of water
Plus: elevation gain (.5 hours) + margin time (.5 hours) = 1 hour = 1 liter of water
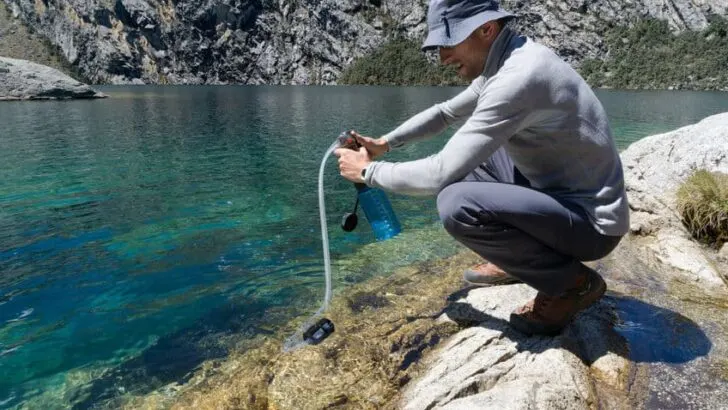
In the above example, carry 2 liters of water. However, if hiking towards a lake, or along a river, bring a 1-liter receptacle and a way to filter water. Arguably, at that point, there may not be much weight difference between the extra water bottle and the filter.
In the end, there is no one system that works for all situations. The best advice is to get familiar with different water carrying systems. Practice in less committing scenarios. Find a combination of water carrying systems and purifying systems that work best for you. Find the balance between how much water you need to carry on the trail and potential water sources along your route.
Dehydration While Backpacking
Water is an essential element for all life. It’s involved in every bodily function: digestion, circulation, temperature control, and excretion of waste. On an average day, we should be drinking at least 2 liters of water. Physical activity boosts our energy, delivers nutrients to muscle cells, and postpones muscle fatigue. When physical activity increases, water intake needs to increase too.
Sweating causes electrolyte loss. Losing too many electrolytes, leads to exhaustion and injuries. It is important to continuously replenish sodium, potassium, magnesium, and calcium. The easiest way to replenish lost vitamins and minerals is by drinking sports drinks (tablets or powder mixes) or eat salty foods (nuts, jerky, pretzels). Full circle: your body needs water to process electrolytes.
Dehydration occurs when the body loses too many fluids. This happens when sweating exceeds the amount of water taken in. Once you start to feel thirsty, you are likely already dehydrated. Symptoms include cramps, headaches, nausea, decrease in performance, and dark urine. Sun exposure can also worsen dehydration; wear sun screen and rest in shady areas.
If it is cold, you may feel less thirsty. But you are still constantly depleting fluids so it is still just as important to continue to drink regularly.
Know Your Water Sources Before You Start Hiking
Map out the water sources along your route. If there are less sources, carry more water on your person. If there is an abundance of water sources, carry less water between fill ups. Depending on the season, water sources may be dry (contact the local rangers or trail stewards and ask for information on conditions).
At each fill up, drink as much as you can and then top-off your bottles. Make it a habit to also have a snack while you fill up to replenish your energy reserves and electrolytes.
Filter from flowing streams and rivers. They are safer sources than wet bogs and standing water (which have higher concentration of algae, parasites, and bacteria). Make sure to fill whenever you find a suitable water source.
Check your campsite ahead of time. If there is no water source at your campsite, carry enough water to your campsite for cooking dinner and breakfast and for re-hydrating that evening and the next morning.
Best Hydration Practices
Be preventative and proactive. It guarantees you will stay healthy and hydrated.
Early and Often – Re-hydrate before you pre-hydrate. Finish off a liter of water the night before and another liter before hiking. You want to start fully hydrated and then maintain that level of hydration throughout. It is a waste of time and energy to have to play catch up, especially if it is within the first couple of miles/hours of your hike.
To test how hydrated you are, rate the color and scent of your urine. It sounds gross, but it’s another way your body is communicating with you. The ideal urine color is a transparent yellow with little to no order. You are dehydrated if your urine is dark and has a strong odor. If your urine is clear and you have the urge to go every 20 minutes, you are over hydrated.
Sip. Don’t Chug – Sipping water every 10-15 minutes is the most efficient method. Your body can only process about a liter of water per an hour. Chugging causes water to pass through your system faster. But you know you best; if you are naturally thirstier, drink more.
Have your water conveniently available (i.e. in a hydration pack, in an accessible backpack pocket, or on the top of your pack). It will be fast and efficient to sip your water throughout the day.
Don’t Over Do It – Drinking too much water can be just as harmful as not drinking enough. Over-hydration, or hyponatremia, occurs when sodium levels in the blood system become diluted, which causes impaired cell function. Symptoms of over-hydration include fatigue, headache, and nausea.
Recovery – Re-hydrate after hiking. It will normalize your fluid levels after a hike.
How to Carry Water When Backpacking
Test your gear before you hit the trail. Check that your bottles are durable and leak proof and that filtering systems are functioning properly. Replace broken parts, and flush your filter out. Have a backup emergency system. For example, in addition to some type of filtering system, also pack purification tablets in your kit.
Types of Water Bottles:
Today backpacking specific water bottles are durable, easy to open, BPA free, and insulated.
Hard Bottles
Pros: durable, easy to filter, easy to pour, easy to measure water consumption, holds warm liquids.
Cons: heavier, takes up room even when empty.
Soft Bottles
Pros: light weight, compacts as it empties.
Cons: can puncture and leak, no hot liquids, less durable.
Also read: Best Water Filter For Long Trail Running Days
Hydration Packs
Pros: easy to drink out of, bladder keeps cool inside a backpack.
Cons: can’t measure remaining water, hard to filter water, can puncture and leak.
Methods of Purifying:
All water filtering systems should remove parasites found in water (like giardia, E. coli, salmonella, cholera, leptospirosis, and cryptosporidium).
Filters (pump filters, squeeze water filtration, straws)
Pros: water is immediately drinkable.
Cons: more weight, need to maintain or replace parts, can become clogged and run slow, can freeze and crack.
UV Pens
Pros: drinkable after 90 seconds, light-weight, reliable, easy to use.
Cons: need to use with wide-mouth water bottles, doesn’t work well with soft water bottles, battery powered, doesn’t eliminate dirt, bugs, or other debris.
Potable Tablets
Pros: reliable, easy to use, light weight, little to no taste, won’t freeze.
Cons: 15-30 minutes before drinkable, doesn’t eliminate dirt, bugs, or other debris.
Boil Water (best used as a backup or in an emergency)
Pros: almost immediately drinkable, guaranteed to remove giardia and cryptosporidium.
Cons: timely, uses fuel resources, end up with hot water, doesn’t eliminate dirt, bugs, or other debris.
In Conclusion…
I believe the most important point in this article is to make sure you have a backup carrying and filtration process. If you have a bladder system and it starts leaking – do you have a backup soft bottle for an emergency? If you have a UV pen for purification, do you have purification tablets in case your batteries die? Have fun out on the trail but also remember the buck stops with you and you alone when it comes to safety and preparedness.
Also, you will more likely regret not having enough water more than you will regret having carried too much water weight in your pack during an urgent situation. Don’t hesitate to pack a little extra, especially if you are a beginner and still learning your way around this amazing activity.
Related content:
Backpacking Food Ideas: Meal Plans and Recipes
49 Ways to Lighten Your Backpacking Load
Just How Light is Ultralight Backpacking? A Beginner’s Guide
Nadine enjoys writing about her love for wild places. As an environmental attorney and adventure writer, she is passionate about combining her legal and political expertise with her personal experiences to protect our constantly changing environment. Find her in the backcountry with her life partner and their dog running, mountain biking, skiing, and climbing.
Leave a comment
You must be logged in to post a comment.